Thursday, April 12, 2007

The Floor is Done (well, almost)

The floor is in! We just need to put the T-transitions on the transitions to tile - the transition strips we have didn't fit due to the height of the tile. (Well, it's fake tile.)

Here are some pics:


Wednesday, April 11, 2007

Stairway to Heaven (or at least the upstairs closet)

Work on the floor continues. These two pictures illustrate an interesting problem with the stair nosings.

Our old subfloor had stair nosings built into the subfloor stair-wood. (This wood remains in place and the hardwood is nailed and glued to it to make the final stairs. When we bought the house rug was in place using tack strips.)

But the new wood requires a square corner (no nosing) so that the hardwood can be placed directly over it. The new nosing is "built into" the hard wood.

So our contractor cut off the nosings in the subfloor.

In this picture you can see the three stages. In the top step, the hole where the nosing fit into the molding has been filled in with extra wood. On the middle step, the riser is in place, covering part of this fill. On the bottom step, the nosing is in place too, completely obscuring the work.

Someone is not very happy about the noise.

Tuesday, April 10, 2007

Installing the Floor (Do not attempt this at home)

The floor is going in - and watching these guys work, there is no doubt in my mind that having it done professionally was the right call. I mean, we knew that anyway, but I have realize that the gap between what we could do and what needs to be done is not just really huge, but really really huge.

Here you can see the basic process: boards are roughly lined up, then hammered laterally into place with a mallet so the tongue-and-grooves lock. Once the placement is right, they use an angled pneumatic nail gun (it has an attachment that makes it fit the floor perfectly each time) to shoot nails in at an angle through the side to the floor they aren't visible.

The work is done in strips from the front wall. But when they reached the stairs, they attached the first stair-nose and then fit everything against it.

Here you can see a little bit of the stair nose. First they cut the wood and hold it in place to make the joint between the nose and the riser that sits behind it. The riser is then nail-gunned into place. The nose is then coated with glue on the bottom and pressed into place against the riser, and reinforced with more nails.

Our subfloor has noses - they have to cut off the noses of the subfloor so that there is a flat edge to build the riser-nose combination against.

Nala is not very happy about this process, which involves a lot of things moving around (always scary), several new people with work boots (not a plus), and a huge amount of noise. She has been hiding behind my desk in the office, about as far from the chaos as she can get.
Like momentum, clutter can be neither created nor destroyed - it is conserved in any frame of reference.

This has been demonstrated again in our house, where Lori and I just went through the firedrill of trying to clear the entire first floor and upstairs hall and master bedroom at once. They were, before last night, how shall we say, um, abundent with clutter.

No longer!

Of course, all that stuff had to go somewhere. The two guest bedrooms are now packed.


And the true problem is my poor office, which has reached a state I can only describe as "one of enriched entropy" and highly, er, thermodynamic.

If I go onto "the hacks of life" and blog that we get a net development win by keeping the X-Plane code extra clean, that picture isn't going to make me very convincing, is it? But wait - conservation of clutter -- clutter removed from the X-Plane code base has to go somewhere.

Monday, April 09, 2007

The Floor Is Here - Part I

The floor is finally happening! Our contractor dropped off the materials and did the rugs in the two guest bedrooms. Here they are with the padding:

and the finished results.

Unfortunately we got a little bit lazy during the delays in selecting materials and didn't finish the base-board trim. It'll be slower going now that the carpet is in.

Here's 570 lbs of hardwood in the living room - in order for them to install it, I have to move all that crap out!

Tuesday, February 20, 2007

The Band Is Coming

And we sort of finisihed the work on the house we wanted to get done. We painted the two guest bedrooms in "Canyon Mist". (I was going to put a stupid post title in, like "Purple Room, Purple Room" but instead you can just jab yourself in the eye with something sharp and possibly non-sterile.) Here's the tour...

The kitchen and dining room...

The living room and family rooms.

Purple bedrooms!

The studio is a total disaster!

Step one - put the cat in the box!

Wednesday, February 14, 2007

It's Official - The RAZR is no longer l33t

...because...I got one. My old phone, which I was determined to keep forever, finally stopped working. Here's a side-by-side comparison.

Of course this picture doesn't do justice to two things:
  1. How insanely thin the RAZR is and
  2. How insanely beaten up my old Sanyo 4700 was. Yes, that is duct-tape holding the back on!
I still think the Sanyo has a lot going for it...it's frickin' indestructible. (Well, it did break, but the amount of abuse it took and the number of years it lasted are beyond the call.) The battery lasts forever, and it's cheap enough that I didn't feel bad leaving it on a DC bus once.

Odds are I won't even use most of the RAZR's cool features...web browsing, text messaging, an MP3 music store, TV, etc. What I am excited about is: it runs Java. We'll see if I can convince it to take some JARs I built out of Sun's J2ME SDK. A RAZR may be cool, but a RAZR with a number puzzle...I have to go towel myself off.

Here's the obligatory picture of the cat for the day...the color is funny because I try to avoid using the flash - she always looks away when the pre-flash hits.

Saturday, January 27, 2007

Scope

In any project, scope is the enemy...that is, the easiest way to assure you won't finish on time is to bite off more than you can chew, especially mid-mouthful.

However that's sort of what we've decided to do with the house - because the wood floor will go into the upstairs, we've added the upstairs to our painting to-do list. The downstairs painting is almost entirely done (except for touch-up).

We've got a date set to put the new floors in, so this gives us a nice hard deadline to try to slam out the upstairs painting. It will be a bit of a grind, but it will be worth it. One of the guest rooms still smells awful (the primary will fix that) and the other one has colors we don't like.

By the time the dust settle we should have entirely new floors, and walls and ceilings in about 2/3 of the house!

I suppose there's another project-management analogy...any task expands to fill the time alotted. We've been working a lot slower this winter, now that the house is in okay condition, than when we first started. Putting in a hard date to get the rest done should help us pick up the pace.

Saturday, January 13, 2007

The Studio Lives!

The Studio Lives! Here are the pictures.


I just set up the full studio today...the part with the dual monitors has been installed for a while.

By comparison, here are two pictures of the old setup from Silverspring...


The most important new feature: the new studio room is large enough that there's a foot of space behind these desks. This means I can rewire things by going back there, instead of reaching and making a huge tangled mess.

(As you can see, the studio got pretty messy last time...)

Monday, January 08, 2007

A Few House Pics

We started painting the trim in the living room and dining room yesterday. It'll take a while - we're going slowly to try to get good coverage on the first coat. (I see a few thin spots - it may turn out to require two coats anyway like the red.)

In the meantime, a few pics of the house...


Monday, December 18, 2006

A One-Coat Wonder?

This weekend our friend Steve came down from Providence and helped us paint the living room - we painted the top of the living room above the chair rail in "Lilting Laughter" (a name which, thanks to my speech impediment*, is virtually impossible to say).

I realize that that doesn't look much different from before...between the camera and the night photo, the subtle change in wall color doesn't come out - the final paint is a warmer white than the primer.

I thought we'd need a second coat, especially since we couldn't tell what we were doing in the poor winter afternoon light, but so far it looks like it went on pretty well!

Monday, December 04, 2006

I wrecked it...well a little...

I was trying to be clever and not leave the masking tape up for 5 years on end, but in pulling off some ceiling tape only a few hours after the second red coat, I took a little paint with me - it came off in a sheet right down to the primer. After waiting a few more hours the rest seems to be adhering better.

See - all that procrastinating with tape was a good idea!

Saturday, December 02, 2006

Red Dining Room - pictures!

Finally! Here are some pictures of the house. We just put the second paint of coat on the dning room and I bought some batteries for the camera, so...


Here's what the dining room looked like after I removed the wallpaper. In that third picture the spackle isn't sanded down yet.

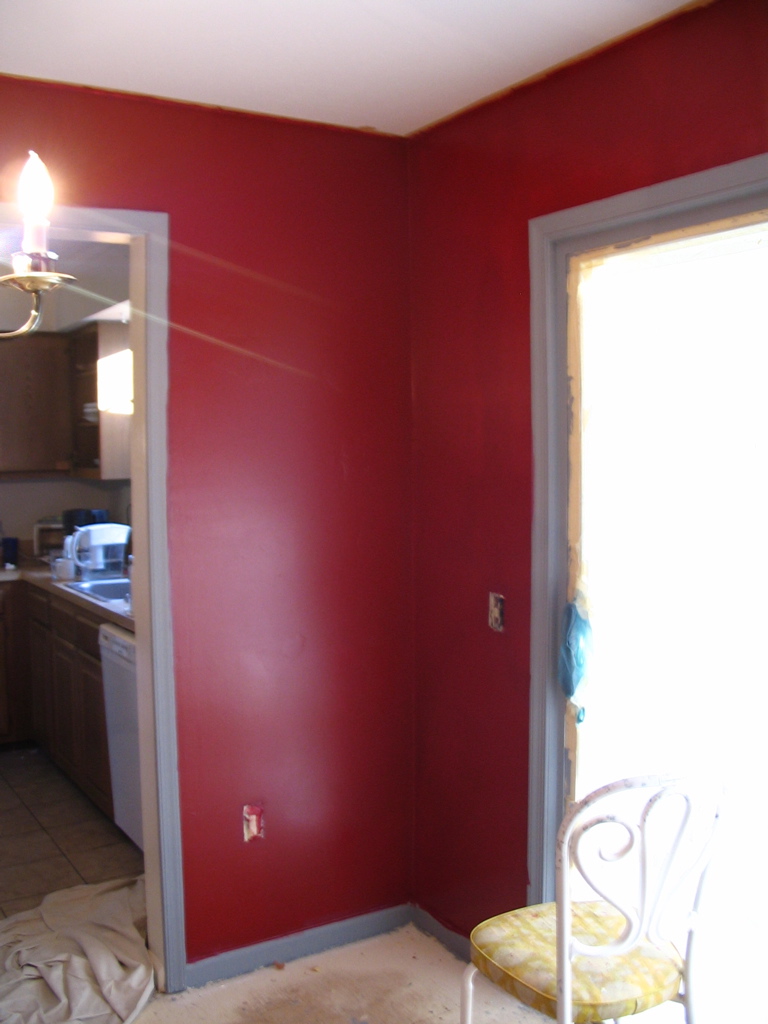
Here's the gray primer (it has sort of a blue tone). It really worked - the red looks just like the paint chip.

Finally here's the room after two coats of red. The trim is still just primer, and we haven't put any sponge colors down yet.

Saturday, November 18, 2006

A Dining Room That Doesn't Show Blood

We just put the first coat of red paint down in the dining room...this is very exciting because it's the first time we're doing something that will actually look good, as opposed to just prep work.

We put a dark grey primer down and the tinting worked; the red looks red like the paint swatch on the first coat. However I do think we'll need two coats of red, just like we needed two coats of primer; the walls have enough texture (read: are so pock-marked from my attempt to remove the old wallpaper) that the paint doesn't quite cover completely on the first try.

Regarding odor: we've got almost the entire house (except for the below-ground family-room area rug-free and it's made an enormous difference...the house is basically smoke free). This is good because with the cold weather we can't do any priming for lack of ventilation. So we can probably use the winter to finish painting, put down flooring, and then buy, like, grown-up furniture. In the spring we can contemplate which room/project is next.

Saturday, October 07, 2006

Wagner Power Roller

When Ami came down to DC to help us start priming, we bought a Wagner power-fed roller. This is a paint roller that's fed via a tube from a paint pump fed from the can. The idea is that you never have to go dip your roller in paint, so you can work faster.

We used the roller on the ceiling, cleaned it according to the manufacturers instructions, and then put it away. When it came time to prime again, I discovered that it wouldn't draw primer. After half an hour of trying to clean it (and successfully feeding water through it via the garden-hose quick-clean attachment) I gave up and did the next ceiling with a conventional roller.

Having tried both methods I came to the conclusion that the Wagner power-fed roller is not as good as a cheap foam roller on an extension poll:
  • The wagner roller is heavy. Any benefit in not having to dip paint is more than lost by having to lift all that weight above your head when doing ceilings. (I think I spend more time rolling and smoothing paint on ceilings than going for refills from the tray.)
  • You can't use an extender poll on the wagner because paint is fed through the poll, so you spend a lot of time repositioning your ladder and can't work on as large of an area. You can't take as long strokes and it requires a lot more shoulder muscle. Ami and I were both very tired after doing 200 square feet of ceiling with the roller; Lori and I did that after doing the dining room today with a conventional roller and don't feel any soreness.
I was going to compare it to a conventional roller on walls, but after not being able to draw primer we took it back to home depot, who took it back for a full refund and marked it defective. I don't know if the problem is that Kilz is too thick for the motor or our unit had a problem or what, but in hindsight I'm happy to return it and use conventional rollers so all's well that ends well.

So perhaps for walls and latex paint the Wagner power roller is a useful tool, but for Kilz on a ceiling I recommend cheap foam rollers.

(For that matter, Kilz is thick nasty stuff and tough to clean, so I think there's something to be said for using the cheapest disposable equipment you can find; there's only so many times you'll be able to clean your brushes before they're toast.)